Monday 26 July 2010

Super Detailing

In the last post I blogged about constructing ruined buildings for the fictional village of Vlissinghe which we made for the TooFatLardies’ participation game of “Through the Mud and the Blood” at several wargame conventions last year. I’d taken the blog posting up to a stage I called “95% finished”. I’d like to mention in this post about how I went about adding the extra steps to add the last “5% stage”.

Before I continue, I’d like to say that the “5% stage” is very optional. Not every wargame building needs it. And even if you think that a building might need that extra detailing, my view would be that the building probably doesn’t need it immediately after you’ve got to the “95% stage”. It’s certainly viable to wait some time after getting to the “5% stage”. On a couple of occasions, I’ve used the nearly-finished buildings in a couple of games, trying to gain a sense of gaming “history” about what’s happened in the building.

That being said, like many gamers, I tend to think that wargames terrain pays back what you put into it. And part of the trick of creating a sense of a time and place in a wargame is in those details of the terrain which catch your eye as you play. So while I don’t rush to add those super-detailing steps, I do like to add them at some point.

In no particular order, here are a few (non-exhaustive) general themes which I follow for super-detailing wargames terrain

1. Setting a time and a place

One of the things that the super-detailing stage can help with is setting a time and a place for your wargame. With our participation game at Antwerp we wanted to set the scene for a Great War battle in a fictitious Flemish village forming part of the German reserve lines on the Siegfried Stellung. To try and achieve this, I added some small details like a scratch-built set of German military signposts and dotted some largish rats around the cellars, craters and trenches on the terrain boards.


I also added a Flemish gabled café with an authentic Flemish name (“de Witte Lelie”). I also added a café sign to try and reinforce the theme.


One unexpected, and slightly difficult to spot connection with Flanders, was to use the special Crisis 2009 giveaway figure, Dulle Griete, in the terrain. A model of Dulle Griete was kindly sent to me by Willie B. of the Tin Soldiers of Antwerp (thanks, Willie) and was used as the figurehead of the village Church, elevating her to the standing of a local saint, Sint Griete.


I hoped that these small touches would catch the eye and set the tone. Perhaps a player or viewer of the game wouldn’t catch all of the hints, but I hoped most of them would be spotted.

2. Through the Keyhole

I sometimes think it’s strange to construct wargame buildings which stand empty, wrecked and battle scarred but with little or no rubble and few signs of life. Of course, there are really good reasons for this. Rubble, splintered and wrecked furniture and fallen roof beams all get in the way of moving figures around the interior of the buildings. In my view, the trick in my view is to give the impression of all the chaos of war, without modelling the rubble as an integral part of the terrain model.

I therefore tried to find some model pieces which could be based inside the damaged buildings, ranging from a wardrobe and an old metal bathtub to a series of bottles and crates in a cellar and a rusty old stove. Most of these I found on the internet, supplied as cheap doll house furniture. For less than £10 I had all the furniture I needed to scatter into a series of bases which could then be inserted on the floors of the damaged buildings.


I tried to match the floor covering of the base with those of the buildings the items were to be placed in. I added a few extras from, basically, scrap-box items: some bottles and beer tankards from an old tavern set for roleplaying games, some letters for the writing bureau scattered on the floor, plenty of rubble (bricks made out of matchsticks or Styrofoam), and bits of balsa and cardboard. Quite a few of the model pieces were made for specific buildings, such as the boxes, bottles and barrels for under "de Witte Lelie" café.


There’s probably no end of modelling you can put into this stage. I had thought of adding family photographs to the walls, but sanity, fortunately, intervened.

You might remember the gaping hole in the floors I’d modelled to give the players a view of the cellars of the buildings in the village, whether filled with a casualty station, a command group or a pack of rats sheltering from the shelling. Despite the cinematic feel of looking down into the crypt of the Church, we found that placing figures on the floor had an added danger that the figures might fall through. I came up with a cheap and easy solution of making floor “coverings”. These are basically a piece of thick card, with some modelled planking or floor tiles (both cardboard) and some rubble. The floor “covering” can be placed over the hole in the cellar, and the figures can safely stand on the “covering” when they need to. The “coverings” also serve to cover over the cellars in the early part of the game for those players wanting to deploy figures in the cellar at the start, but away from the gaze of their opponent.


Here's a couple of pictures showing the furniture scattered throughout a couple of buildings, first "de Witte Lelie", and then a badly damaged shop.


3. I love the sound of breaking glass

One optional extra I tried for the first time in modelling the village was to add broken glass in some of the windows. This was perhaps the most fiddly part of modelling, the buildings, mainly because of the difficulty of fitting the glass into the windows once I had finished construction.

I used clear modelling plastic (picked up from the wonderful 4D Model shop in East London) which I cut out using a scalpel and a pair of sharp scissors. I cut the glass to fit the standard sized windows I’d used in the various buildings, and then cut each window in two, using each cut half in a different window.


The advantage of using the clear plastic was that it was easy to cut and splinter and could be scored with a scalpel or hobby knife. I glued the glass into the frame using araldite epoxy resin. I chose an epoxy as this would take longer to set than superglue, allowing me to place the glass into each window and move it around to get the best position.


Once the glass had set, I thought that it looked a little strange having pristine clear glass in a series of shelled out, battle scorched buildings. I therefore added some dirty grey-green paint effects around the windows along the sill, and then mixed up some green and sepia washes from the Citadel washes range. I then painted dirty wash over the shattered remains of the windows, leaving a grimy but still transparent covering as if the window had been stained with soot, smoke and general dirt during the period the building had been damaged. I used any small off-cuts of the clear plastic as shattered “glass” on the ground.


4. Specific scenario details

Sometimes there’s a special terrain piece which really adds to the game. In Peter Barton’s wonderful book of panoramas on the battle of Passchendaele, there’s an illustration of a German concrete bunker built inside a Flemish farmhouse. These were not uncommon features of the Flanders part of the Siegfried Stellung, and I wanted to try and build a pillbox into one of the buildings along the front line of the trench boards. The pillbox was fairly easy to scratch build out of an off-cutt of Styrofoam, and fits into one of the damaged houses.


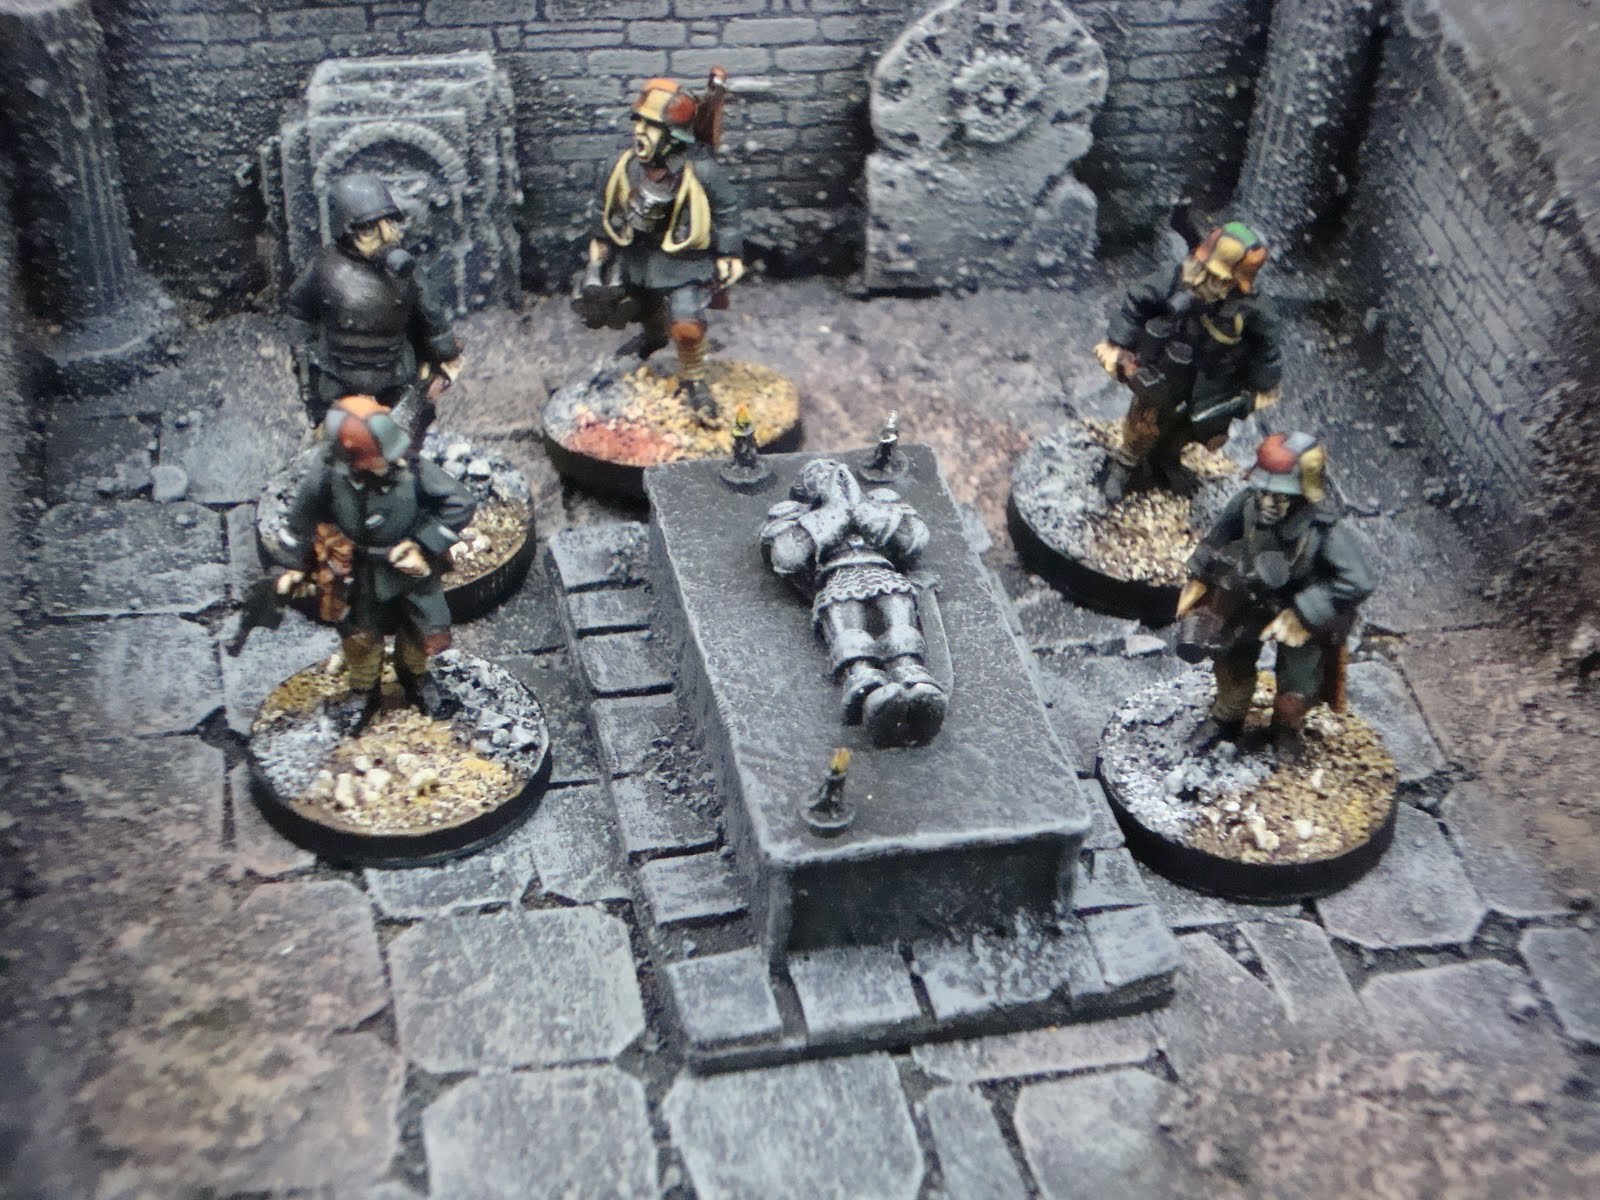
I tried something similar regarding the crypt of the church of Sint Griete, finding a set of gravestones and an old Citadel Paladin on Ebay. While the crypt was meant to represent a large area which could be used a a command strongpoint for the defending forces, it formed too good an empty space to be left without some ecclesiastical furniture! All of the crtpt, except the gravestones and the Paladin was scratch-built from bits-box odds and ends, including a felt-tip pen top at each corner to resemble a stone column.


5. The detritus of war

Finally, I added a selection of military detritus, such as a couple of machine guns and rifles discarded in craters, spent bullet cartridges, abandoned helmets and the occasional dead soldier.


These were pretty easy to add to the boards and the buildings, with the spare weapons being available from a variety of retailers online. I thought it was easy to over do these aspects, so I used them in a couple of places and tried not to exaggerate them.

6. There and Back Again

Last but not least, and mindful of the trip to Antwerp, I used one of the Styrofoam boxes as storage for the village, cutting out a place for each of the buildings in one of the thinner Styrofoam sheets.


So, What's Next....

Well, that brings me to the end of the blog posts dealing with how we constructed the trench terrain and village boards for the "through the Mud and the Blood" participation game at Crisis 2009 in Antwerp. In the next post, I’ll pass on some of our experiences of running the participation games last year, as well as looking forward to some of the other Great War wargaming topics I’d like to cover in this blog in the future.

Tuesday 13 July 2010

Ruined Buildings – This was once a village

After finishing the Vlissinghe terrain boards, our next stage was to construct the ruined and semi-ruined buildings in the village. There were six buildings to be constructed - five houses and one church. I’d allowed 6 weeks for the building and painting of the buildings, but even with this fairly flexible timescale, constructing the model buildings took more time than I had anticipated (leading to a bit of a rush in the final week before the Crisis show on 7 November 2009). So much so that I had to rope various club members into helping at the last minute, and leading to one of my favourite maxims for wargame terrain construction – “Wherever possible, make it a team effort!

I’ve set out in this blog post the basic stages we used in constructing the ruined buildings. It might be helpful, as a reminder of my earlier blog posts, to mention what we were trying to achieve. We were looking for an impression of a shell-shattered village in Flanders or France, but not one which had been completely destroyed. We wanted the village to add to the attractiveness of the participation game at the Crisis show in Antwerp, and we were prepared to sacrifice a little realism to do so. We could easily, and realistically, have modelled a pile of rubble on the terrain boards. But we wanted to create a village which had been lightly shelled – perhaps being a village around which the rear lines of the Siegfried Stellung had been constructed.

We also wanted the terrain to be practical for a wargame. We felt pretty strongly that it was no use having perfectly modelled terrain if no figures could be positioned within the buildings. So the buildings needed to display damage, but not be covered with rubble which might prevent them being useable wargames terrain. To illustrate how we went about achieving these aims, the blog post covers the basic construction of the village’s ruined café, De Witte Lelie.

Each of the buildings is constructed in broadly the same way. I find that it’s best to start with a plan, and again a series of rough drawings or ideas in a notebook helps.


The first stage is to prepare the walls of the building. I used foamboard, being readily available and very easy to work with. The walls were cut using a new scalpel blade and steel rule, any measurements being done with a fair amount of care, especially on the café’s Flemish gable ends.


After cutting the walls, I added window lintels and sills, and a front door out of plasticard and cardboard. I added some brick effect to the exterior walls, sometimes using embossed plasticard and in most cases, as with the café, simply cutting squares of thin card to recreate a rough brick effect.


I tried to imagine what the building would have looked like intact, and helped with adding some interior walls. I didn’t bother with a staircase in most of the buildings - I found from other terrain projects that while a fairly intact building with full interior walls and staircases looks great, it has some disadvantages when actually using the buildings to inserting and remove figures during a game. This comes back to one of the terrain maxims I mentioned in an earlier blog post: "Think Macro, Not Micro".

The point when you first fit the walls together is hopefully (providing your measurements are correct, a rewarding moment! Although the building is far from finished, you can start to get the impression of a finished model building coming together. I used pins to hold the walls together in a “dry run” in order to check the overall fit, and also to check the precise floor are which would be available.


Once the walls are cut, the base of the building is the next step. I tend to use 1/8th marine plywood on all my 28mm scale terrain buildings because as it is very resistant to warping. I cut out a central section in the base (allowing the viewer to see through the hole into the cellar of the café) and then reassembled with a piece of card to hold the various pieces of wood together. The card was cut in such a way that a central hole would allow sight of the cellar, and the floor tiles could be scattered around the hole, adding the impression that the floor had fallen through.


My original thought on this building was to build and paint the floor first, importing a dramatic (and, in retrospect, a rather over the top) black and white tiled Flemish flooring effect. However, as this would mean having to construct and paint the floor first, and then build the walls around , I decided that sounded like a plan for disaster. So I built the floor, scattering the “floor tiles” (thin card) and then prepared the walls for being glued into place before any painting had started.


The walls were then glued in place with PVA, with dressmakers’ pins being used to hold the walls in place and provide extra support. I glued the walls to the base using an epoxy resin for extra strength and “painted” an extra coating of PVA along the corners of the walls to make the bonds tight before adding some doorsteps and leaving the whole model overnight to dry.


While drying I prepared the roof and upper floors. The method is fairly similar, essentially using a few scraps of foamboard, some balsa wood, coffee stirrers and more thin card. The floors were cut in a shape which can fit easily into a surviving corner of the building. The idea was to give a sufficient ledge to place a number of figures on to gain a clear height advantage over figures on the ground. The loft roof was solely included as a sniper’s position (a slightly “cinematic” concession). The foamboard floor was then covered in lengths of appropriately cut balsa wood or coffee stirrers, and left to dry.


The roof was the same idea, although I used thinner card in place of foamboard for the roof, supported by some balsa roof timbers for effect. We found that in the other ruined model buildings which featured a large still-intact roof area, this had a nasty habit of impeding players getting their hands into the building to move figures around. With the village café, I therefore went for a I there went for a “cinematic” roof effect with a small area of intact roof timbers on one side of the building. It was a personal choice, but one which seemed to be reasonable bearing in mind how people had found more accurately ruined model buildings in other games at our club. Again, this follows another terrain maxim I’ve mentioned before: "remember you're building wargaming terrain, not a museum model".


The roof and the floor were then added to the (now glued dry) shell of the café with more pins being used to support the roof and the floor areas. I found that the combination of the pins and PVA glue was more than enough to hold the floors in place, although I used epoxy resin to cement the roof onto the exterior walls and make a really strong bond.


At this stage I wanted to add some more damage to the building. I wanted to add an impression of rubble and therefore scattered a mixture of grit and builders’ sand on the inside of the ground floor and some of the upper floors, as well as manufacturing a number of Styrofoam “bricks” for gluing into the corners of the building or on the outside of the remaining walls. I tried not to drop these bricks in the centre of the floor, leaving room for figures to be placed in the centre, and also leaving room for the floor-covering (of which more in the next blog post).


On some of the buildings I added Milliput sandbags and fallen roof beams, but I did not want to over-do this and so I ended up using that effect fairly sparingly. I also tried gluing the “bricks” onto the broken sections of wall.


This seems right to me, but I can appreciate that many may say that the scale of the bricks should be smaller. However, I felt this looked right, and, in a “cinematic” theme again, that was the direction we were heading towards.


The final main building stage before painting was to make a thin wash of water, polyfilla (interior plaster) and PVA glue which can be lightly brushed over the walls of the building providing texture and generally strengthening the model. I used this only on the walls and not the roof or the floor (which was already scattered with sand and the odd Styrofoam “brick” or two).

I then had a basic finished building. To bring everything together, I spray painted the model black with a matt car spray enamel, the colour being a personal preference although grey would have done just fine as well and might have been preferred for an intact, undamaged model.


All that was then needed was to paint the building, which I did “inside-out” starting with the floor, and working up the interior walls and finishing no the outside and the roof. That got us to the point when we could use the building on the wargames table and practice the participation game, a sort of “95% finished effect”, if you like.


In my next blog post, I’d like to offer some suggestions on super-detailing and ways in which to bring the model to life and get that “100% finished effect”.
Related Posts Plugin for WordPress, Blogger...